Wiki · Classes

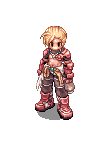
Mechanic

Weapons and machinery. Skills come from the active server database.

Механик
Job #4058

Mechanic

Weapons and machinery

71 available skills, including inherited skills from previous jobs.

How to obtain this job

Requirements and step-by-step route

Where to start

Chainheart

Map: yuno · coordinates: 129, 156

/navi yuno 129/156

What to prepare

  • Blacksmith or Whitesmith. Spend all Skill Points and dismount before changing jobs.
  • Keep at least 30 weight and inventory space available to pass Scholar's check.
  • No particular stat distribution or separate prerequisite quest is required; the route passes through the dangerous Juperos ruins.
  • No items need to be handed in. Bring your own healing supplies for the journey through the ruins.

Walkthrough

  1. Step 1

    Speak to Chainheart: /navi yuno 129/156. Listen to the story about machines and ask to learn more until he directs you to Juperos.

  2. Step 2

    Reach Scholar: /navi jupe_cave 37/55. After the preparation check, agree to enter the special area.

  3. Step 3

    Speak to Ghostfire in order: /navi jupe_core2 149/273, /navi jupe_core2 53/75 and /navi jupe_core2 242/62. Continue the story and focus on the explanations.

  4. Step 4

    After the third fire, step on the western point: /navi jupe_core2 29/150. Then visit the eastern point: /navi jupe_core2 272/149. These events drain some HP/SP; prepare healing supplies.

  5. Step 5

    While the door is visible, approach /navi jupe_core2 288/142 and finish the conversation. If the door disappears, activate the eastern point again.

  6. Step 6

    Visit the southern knowledge point: /navi jupe_core2 149/34. After receiving the knowledge, return to the first Ghostfire: /navi jupe_core2 149/273 to finish the stage and leave.

  7. Step 7

    Return to Chainheart: /navi yuno 129/156. Spend your Skill Points, dismount and finish the conversation to receive the job.

Result

You become a Mechanic; you receive a Driver Band matching your character's gender and Green Apple Ring, and the Juperos quest chain is marked complete.

Next jobs

Progression: levels and equipment

Where to go and what to wear at each stage, from Eden to shadow equipment

Level 1–11

Getting started and reaching Eden

Finish the novice training and take your first job at Job Level 10; the requirements are listed above under the job change guide.

All early equipment comes from the Eden Group. Reach it through an Eden Teleport Officer, found in almost every town.

In Eden talk to Secretary Lime Evenor to join the group. Equipment quests open at level 12.

Eden Teleport Officer in Prontera

/navi prontera 124/76

Secretary Lime Evenor

/navi moc_para01 27/35
Level 12–25

First Eden set

Take a quest from Instructor Boya. At levels 12–19 he sends you to the Talking Dog, at 20–25 to the Timid Cat. One of them is enough.

Report to Boya and collect the reward from Administrator Michael: the Eden hat, manteau, boots and uniform.

Alongside, take hunting quests from the Mission [11 - 25] board; they are the main source of experience at these levels.

Instructor Boya

/navi moc_para01 25/35

Talking Dog (12–19)

/navi moc_fild11 180/253

Timid Cat (20–25)

/navi prt_sewb1 131/262

Administrator Michael — reward

/navi moc_para01 112/96

Mission [11 - 25] board

/navi moc_para01 36/38
Level 26–39

Eden weapon and second set

Go back to Instructor Boya. At levels 26–32 he sends you to Eden Member Karl, at 33–39 to Eden Member Cloud.

After reporting, Administrator Michael hands out an Eden weapon of your choice for your class (requires level 26) plus second-tier boots and uniform.

Hunting quests are on the Mission [26 - 40] board.

Eden Member Karl (26–32)

/navi pay_arche 41/136

Eden Member Cloud (33–39)

/navi anthell01 29/264

Mission [26 - 40] board

/navi moc_para01 38/38
Level 40–59

Third Eden set

Instructor Boya's third quest: at levels 40–59 he sends you to Eden Member Hooksha in the Orc Village, from level 60 to Eden Member Callandiva.

Reward from Administrator Michael: the next-tier Eden weapon (requires level 40) plus third-tier boots and uniform.

The second job is taken in this range, at Job Level 40–50 of the first job. No need to rush: Job 50 gives more skill points.

Hunting quests are on the Mission [41 - 55] and Mission [56 - 70] boards.

Eden Member Hooksha (40–59)

/navi in_orcs01 38/175

Eden Member Callandiva (60+)

/navi iz_dun04 43/46

Mission [41 - 55] board

/navi moc_para01 40/38

Mission [56 - 70] board

/navi moc_para01 42/38
Level 60–99

Eden advanced training

From level 60 quests come from Instructor Ur. He sends you to field instructors in turn: 60–69 Comodo, 70–79 Glast Heim, 80–89 Einbroch, 90–99 Ice Dungeon.

After the first report to Ur talk to Blacksmith Thorn; he hands out the fourth and best Eden set: hat, mantle, boots and uniform.

Weapons Expert BK upgrades the Eden weapon: one enchant after the Glast Heim quest, a second after Einbroch. Bring the Eden weapon in your inventory.

Hunting quests are on the Mission [71 - 85], 86-90 and 91-99 boards. At level 99 with Job Level 50 you take the third job.

Instructor Ur

/navi moc_para01 23/35

Comodo (60–69)

/navi comodo 173/354

Glast Heim (70–79)

/navi glast_01 195/131

Einbroch (80–89)

/navi ein_fild08 172/359

Ice Dungeon (90–99)

/navi ice_dun01 154/13

Blacksmith Thorn — set IV

/navi moc_para01 111/83

Weapons Expert BK — weapon

/navi moc_para01 112/79

86-90 and 91-99 boards

/navi moc_para01 48/176
Level 70–99

Access to the New World (Onward to the New World)

Episode 16.1 and Noblesse cannot be started without this quest, so finish it ahead of time, before level 100. Requires level 70.

1. Take the quest from the Promotional Staff in Prontera.

2. Promotional Staff in Aldebaran: talk and bring 300 Jellopy.

3. Promotional Staff in Geffen: talk, bring 1 Emerald, then 1 Ruby.

4. Promotional Staff in Izlude: from level 70 he lets you through at once; earlier he asks you to return at 70.

5. Return to the Promotional Staff in Prontera; he sends you to Lighthalzen.

6. In Lighthalzen talk to the Guide and go to the alliance headquarters to Sikaiz. Keep talking until he sends you to the Prontera palace.

7. Alliance Manager in the Prontera palace: talk and return to Sikaiz.

8. Sikaiz sends you to the Rachel temple to the Alliance Manager; talk and return to Sikaiz again. At the end he asks you to type your character name; type it exactly, case-sensitive.

9. Talk twice to Officer A or Officer B in the same building.

10. The Guard in the alliance headquarters moves you to the rift. The Rift Guard takes you to the field where Munkenro stands.

11. Munkenro's trial: after you confirm, 80 Allied Soldiers appear on the field. They must be defeated within 15 minutes; bring a party or a stock of potions. If time runs out, Munkenro lets you try again.

12. After the victory talk to Munkenro; access is granted. Later the New World is reached through the Time-Space Gap Guard in the Morroc Ruins.

Promotional Staff — Prontera

/navi prontera 163/53

Promotional Staff — Aldebaran

/navi aldebaran 127/138

Promotional Staff — Geffen

/navi geffen 90/67

Promotional Staff — Izlude

/navi izlude 102/171

Guide — Lighthalzen

/navi lighthalzen 220/292

Sikaiz — alliance headquarters

/navi lhz_in01 132/259

Alliance Manager — Prontera palace

/navi prt_cas 19/98

Alliance Manager — Rachel temple

/navi ra_temple 119/113

Officer A

/navi lhz_in01 32/22

Guard — way to the rift

/navi lhz_in01 130/232

Time-Space Gap Guard — after the quest

/navi moc_ruins 137/89
What you get
Level 100+

Third job: Noblesse (episode 16.1)

The first class set after Eden. Requires level 100 and access to the New World (episode 13.1 quest Onward to the New World).

The episode story starts at the Royal Messenger in Prontera. Quests reward Honor Token.

The set is sold by the Noblesse Operator in the palace. Below is what he offers your branch and for how much.

Experience at 100–140 comes from Eden quests: Gelkah and Rohtert (100–110), Mingmin (111–120), Melody-Jack and Aigu (121–130), Ragi (131–140). From level 100 Instructor Ur sends you to the Ash Vacuum.

Royal Messenger — episode start

/navi prontera 121/72

Noblesse Operator

/navi prt_cas 165/260

Eden quests 100–110

/navi moc_para01 37/95

Eden quests 111–120

/navi moc_para01 17/95

Eden quests 121–130

/navi moc_para01 44/81

Eden quests 131–140

/navi moc_para01 41/76
Level 120+

Ghost Palace: Thanos weapons

An instance from level 120. Enter through the Unpleasant Royal Guard; clearing it rewards Gray Shard.

The Dimension Traveler next to the entrance trades Gray Shard for Thanos weapons and Gray armor. Prices are shown in his exchange menu.

This is one weapon branch, not a mandatory step: compare it with what you already wear.

Ghost Palace entrance

/navi dali02 43/129

Dimension Traveler — exchange

/navi dali02 51/130
What you get
Level 125+

Imperial (episode 16.2)

The continuation of the 16.1 story. The second tier of the class set is sold by the Imperial Operator at the rebel base.

Offers for your branch are listed below.

Imperial Operator

/navi rebel_in 99/51
Level 130+

Old Glast Heim: Temporal Boots

An instance from level 130, entered through Hugin. The reward is Temporal Crystal.

Hugin's Butler trades 1 Temporal Crystal for Temporal Boots and, for 5 Temporal Crystal, turns them into boots for a chosen stat.

Hugin — entrance

/navi glast_01 204/273

Hugin's Butler — boots

/navi glast_01 210/273
Level 130–150+

Illusion and Grace (episode 17.1)

Episode 17.1 continues the 16.2 story and opens at level 130. The vendors stand in the sp_cor laboratory and become available after the episode's story quests.

Elyumina sells Illusion armor (level 130), a flexible branch with modules.

The Grace Operator sells the third tier of the class set, Grace (level 150). Parts cost Mysterious Component, the +9 refine ticket costs Cor Core. Offers for your branch are listed below.

Before spending resources compare a full Grace set with Illusion: different builds favour different ones.

Elyumina — Illusion

/navi sp_cor 111/130

Grace Operator

/navi sp_cor 136/156
Level 160+

Automatic (episode 17.2)

An upgrade of Illusion armor. Yeoncheong trades an Illusion piece refined to +9 plus 900 Barmil Ticket for the matching Automatic piece.

This is an expensive step: refining Illusion to +9 the usual way is very hard. Automatic is optional; ticketed Grace +9 remains a working set until episode 18.

Yeoncheong — Automatic exchange

/navi ba_in01 87/383
Level 170–190+

Gray Wolf (episode 18)

Episode 18 opens at level 170; Gray Wolf equipment is worn from 190.

Emmet in the wolf village sells any piece for 350 Amethyst Fragment. Asad sells refine tickets: +7 for 1050 and +9 for 2250 Amethyst Fragment.

Three main pieces refined to +9 by tickets cost 7,800 Amethyst Fragment; it is a long-term goal, plan it in days.

Emmet — equipment

/navi wolfvill 164/137

Asad — refine tickets

/navi wolfvill 167/135
What you get
Level Separate layer

Shadow equipment

Shadow gear uses six separate slots and is worn over regular equipment, so it can be collected alongside any set.

Sets are sold by Cat Hand Salesman Macaroon for [Kachua] Mileage Coupon: a cube with three pieces of a class set costs 15 coupons. The wiki page of each cube shows what is inside.

[Kachua] Mileage Coupon is given when a secret box is opened with a Kachua's Secret Key.

Right now keys do not drop from monsters and are not sold by NPCs.
Cat Hand Salesman Macaroon

/navi itemmall 41/53

Suggested builds

Starting points for character development, rather than mandatory templates.

Skills

Maximum level and purpose according to the server database.

SkillLevelTypeTarget
Basic SkillNV_BASIC 9 Passive Passive First AidNV_FIRSTAID 1 Passive Self Play DeadNV_TRICKDEAD 1 Passive Self Call BabyWE_CALLBABY 1 Passive Self Enlarge Weight LimitMC_INCCARRY 10 Passive Passive DiscountMC_DISCOUNT 10 Passive Passive OverchargeMC_OVERCHARGE 10 Passive Passive PushcartMC_PUSHCART 10 Passive Passive Item AppraisalMC_IDENTIFY 1 Passive Self VendingMC_VENDING 10 Passive Self MammoniteMC_MAMMONITE 10 Physical Enemy Cart RevolutionMC_CARTREVOLUTION 1 Physical Enemy Change CartMC_CHANGECART 1 Passive Self Crazy UproarMC_LOUD 1 Physical Self Open Buying StoreALL_BUYING_STORE 1 Passive Self Decorate CartMC_CARTDECORATE 1 Passive Self Iron TemperingBS_IRON 5 Physical Passive Steel TemperingBS_STEEL 5 Physical Passive Enchanted Stone CraftBS_ENCHANTEDSTONE 5 Physical Passive Oridecon ResearchBS_ORIDEOCON 5 Physical Passive Smith DaggerBS_DAGGER 3 Physical Passive Smith SwordBS_SWORD 3 Physical Passive Smith Two-handed SwordBS_TWOHANDSWORD 3 Physical Passive Smith AxeBS_AXE 3 Physical Passive Smith MaceBS_MACE 3 Physical Passive Smith KnucklebraceBS_KNUCKLE 3 Physical Passive Smith SpearBS_SPEAR 3 Physical Passive Hilt BindingBS_HILTBINDING 1 Physical Passive Ore DiscoveryBS_FINDINGORE 1 Physical Passive Weaponry ResearchBS_WEAPONRESEARCH 10 Physical Passive Weapon RepairBS_REPAIRWEAPON 1 Physical Ally Skin TemperingBS_SKINTEMPER 5 Physical Passive Hammer FallBS_HAMMERFALL 5 Physical Area Adrenaline RushBS_ADRENALINE 5 Physical Self Weapon PerfectionBS_WEAPONPERFECT 5 Physical Self Power-ThrustBS_OVERTHRUST 5 Physical Self Maximize PowerBS_MAXIMIZE 5 Physical Self Unfair TrickBS_UNFAIRLYTRICK 1 Physical Passive GreedBS_GREED 1 Physical Self Advanced Adrenaline RushBS_ADRENALINE2 1 Physical Self Mado LicenseNC_MADOLICENCE 5 Passive Passive Boost KnuckleNC_BOOSTKNUCKLE 5 Physical Enemy Pile BunkerNC_PILEBUNKER 3 Physical Enemy Vulcan ArmNC_VULCANARM 3 Physical Enemy Flame LauncherNC_FLAMELAUNCHER 3 Physical Enemy Cold SlowerNC_COLDSLOWER 3 Physical Area Arm CannonNC_ARMSCANNON 5 Physical Enemy AccelerationNC_ACCELERATION 3 Passive Self HoveringNC_HOVERING 1 Passive Self Front-Side SlideNC_F_SIDESLIDE 1 Passive Self Back-Side SlideNC_B_SIDESLIDE 1 Passive Self Mainframe RestructureNC_MAINFRAME 4 Passive Passive Self DestructionNC_SELFDESTRUCTION 3 Physical Self Shape ShiftNC_SHAPESHIFT 4 Passive Self Emergency CoolNC_EMERGENCYCOOL 1 Passive Self Infrared ScanNC_INFRAREDSCAN 1 Passive Self AnalyzeNC_ANALYZE 3 Passive Enemy Magnetic FieldNC_MAGNETICFIELD 3 Passive Self Neutral BarrierNC_NEUTRALBARRIER 3 Passive Self Stealth FieldNC_STEALTHFIELD 3 Passive Self RepairNC_REPAIR 5 Magic Ally Axe TrainingNC_TRAININGAXE 10 Passive Passive Research Fire/EarthNC_RESEARCHFE 5 Passive Passive Axe BoomerangNC_AXEBOOMERANG 5 Physical Enemy Power SwingNC_POWERSWING 10 Physical Enemy Axe TornadoNC_AXETORNADO 5 Physical Self FAW - Silver SniperNC_SILVERSNIPER 5 Passive Area FAW - Magic DecoyNC_MAGICDECOY 5 Passive Area FAW RemovalNC_DISJOINT 1 Passive Enemy Magma EruptionNC_MAGMA_ERUPTION 5 Physical Area Full ThrottleALL_FULL_THROTTLE 5 Passive Self
← All classes