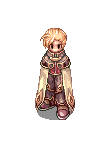
Start with the Wizard Guildsman at the top of the tower: . Deliver your assigned gemstones or obtain an exemption at Job 50.
Wizard Guildsman
Step 2
Visit the Gloomy Wizard: . Pass one random theory test, then accept the combat test.
Gloomy Wizard
Step 3
After transport to job_wiz, speak with the Arena Assistant: . Wait for entry to the test room.
Arena Assistant
Step 4
Clear the Water, Earth and Fire rooms in order, including enemies that appear after the first group. Use Wind against Water, Fire against Earth and Water against Fire.
Step 5
After passing combat, speak with the Gloomy Wizard, then return to the Wizard Guildsman at and confirm advancement. After failure, visit the examiner again.
Wizard Guildsman
Test answers
The question set is chosen at random. The answer number is its position in the list of options, counted from the top. Each correct answer gives 10 points.
Gloomy Wizard — set 1
1. Which of the following is not necessary to learn Fire Wall? Answer 4: Napalm Beat Lv 4
2. Regaurdless of it's previous attribute, What does the monster's attribute change to when you cast Frost Diver on it? Answer 1: Water
3. When you completely master Napalm Beat, what is the ratio of the increased MATK using that spell? Answer 2: 1.7 times
4. What item do you need when casting Stone Curse? Answer 4: Red Gemstone
5. Which of the following is not required to master Safety Wall? Answer 3: Increase SP Recovery Lv 6
6. Without the INT bonus, what amount of SP is recovered every 10 seconds when you have learned Increase SP Recovery Lv 7? Answer 2: 21
7. Using Energy Coat, when you have 50% of your SP remaining, how much SP is used when hit, and what percentage is damage reduced by? Answer 2: Damage 18% SP2%
8. How much SP is consumed and how many times can you avoid attacks when using Safety Wall Lv 6? Answer 3: SP 40, 7 times
9. How much SP is needed when using Lv 10 Thunderstorm? Answer 2: 74
10. Which skill is most useful training in the Byalan Dungeon? Answer 1: Lightning Bolt
Gloomy Wizard — set 2
1. Which monster can you obtain a slotted Guard from? Answer 3: Pupa
2. Which of the following is the easiest monster for a low level Mage to hunt? Answer 1: Flora
3. Which monster will not be affected by Stone Curse? Answer 2: Evil Druid
4. When attacking a Lv 3 water attribute monster with a wind attribute weapon, what is the damage percentage? Answer 4: 200%
5. If a Baby Desert Wolf and a Familiar fought, which one would win? Answer 1: Baby Desert Wolf
6. Which of the following cannot be a Cute Pet? Answer 2: Roda Frog
7. Choose the monster that is weak against a fire attribute attack. Answer 4: Hammer Goblin
8. Which of the following has the highest defense? Answer 4: Caramel
9. Choose the monster that's of a different species. Answer 3: Ghostring
10. Which of the following is not an Undead monster? Answer 3: Deviace
Gloomy Wizard — set 3
1. Which stat is the most important for a Mage? Answer 1: INT
2. Which attribute does not have a 'Bolt' type attack? Answer 2: Earth
3. Choose the one that does not relate to a Mage. Answer 3: Good at selling stuff.
4. Which town is the home of Mages? Answer 4: Geffen
5. Which of the following cards has nothing to do with INT? Answer 2: Soldier Andre Card
6. What is the Mage good at compared to other job classes? Answer 4: Exceptional Magic Skills
7. What is the INT bonus at Job Lv 40 for a Mage? Answer 4: 5
8. Which item can a Mage not equip? Answer 2: Boys Cap
9. Which of the following is the catalyst when making the Mage test solution 3? Answer 1: Blue Gemstone
10. Which card is irrelevant to magic? Answer 2: Magnolia Card
Gloomy Wizard — set 4
1. Choose the monster with a different attribute than the others. Answer 2: Cornutus
2. Choose the monster that is not a looting one. Answer 4: Zerom
3. Which of these monsters does not recognize casting? Answer 1: Marina
4. Choose the spell that would be efficient against a Marine Sphere. Answer 3: Lightning Bolt
5. Choose the monster that can move. Answer 4: Frilldora
Result
You advance to the corresponding second job. Any first job levels you did not earn become unavailable after changing jobs.
Where to go and what to wear at each stage, from Eden to shadow equipment
Level 1–9Getting started and joining Eden
1. Finish the novice training and take your first job at Job Level 10; the requirements are listed above under the job change guide.
2. Your main route to level 100 and beyond is the Eden Group. It hands out Paradise gear for free and gives experience for daily missions from its boards.
3. How to reach the headquarters: walk up to an Eden Teleport Officer, found in almost every town, and ask to be moved to Eden.
4. In the headquarters talk to Secretary Lime Evenor at the entrance and join. You receive the Eden Group Mark: without it the Administrators and the boards do not work for you.
5. Board missions are open from level 1: start with the 1~39 board by the entrance. Choose an area and a mission, kill the monsters named and report at the same board. Each mission can be done once a day; the reset is at 00:00 Moscow time.
6. In game the @guide command shows what to do at your level at any time.
1. From level 10 go to the armory of the headquarters: the blue door to the right of the mission boards; Administrator BK stands by the far wall. Free some inventory space and weight first.
2. BK gives a beginner weapon (pick the one for your job) and a six-piece armor set, physical or magical, for free. No field training is needed.
3. The set's bonuses grow with your level up to 100, so you need not replace it before your third job. The gear is bound to the character; BK hands out a lost piece again.
4. If you want the achievement for meeting the Administrators, take the errand from Instructor Boya and Instructor Ur at the entrance: they send you to every Administrator in turn.
5. Experience: the 1~39 and 40~69 boards. The Logistics Officer at the entrance also takes 30 of the listed monster items once an hour per kind and pays in experience.
6. Your second job is taken in this range too, at Job Level 40–50 of the first job. Do not hurry: Job 50 gives more skill points.
1. From level 45 with a second (or extended) job, Administrator Michael in the armory gives an intermediate weapon for free: one of two for your job.
2. The armor stays the beginner set: its bonuses keep growing up to level 100.
3. Experience: the 40~69 and 70~99 boards. The Champion Hunt Board at the entrance asks you to find a champion on the map named; report to Diligent Sogil next to the board, once a day.
4. Some missions' monsters are quicker to reach: the Eden guides near Juno, Veins, Lighthalzen and Geffen take a member who holds such a mission straight to them.
5. At level 99 with Job Level 50 you take your third job.
6. From level 70 do the New World access quest (next section): episodes 16.1 and later need it.
Level 70+Access to the New World (Onward to the New World)
Episode 16.1 and the Noblesse gear need this quest.
Requirements: level 70, no upper limit. Bring 300 Jellopy, 1 Emerald and 1 Ruby.
Emerald and Ruby are sold by jewelers: in the Morocc ruins by the pyramid (/navi moc_ruins 110/105), in Morocc and in Lighthalzen.
Reward: twice 66,000 base and 21,000 job experience (from the Recruiter and from Munkenro) and access to the New World: the Midgard expedition camp and its quests.
Step 1
Enter the Prontera palace (entrance in the north of the town). Right past the entrance, left of the red carpet, stands the Recruiter for the Brave: agree to join the expedition.
Recruiter for the Brave
Prontera palace (prt_cas), point 207/165, right by the entrance.
/navi prontera 156/358
Step 2
Aldebaran: the Promotional Staff stands left of the clock tower. Bring 300 Jellopy; he sends you on to Geffen.
Promotional Staff
Aldebaran (aldebaran), point 127/138.
/navi aldebaran 127/138
Step 3
Geffen: the Promotional Staff is along the path to the left of the centre. He asks for 1 Emerald, then 1 Ruby, and sends you to Izlude.
Promotional Staff
Geffen (geffen), point 90/67.
/navi geffen 90/67
Step 4
Izlude: the Promotional Staff by the wall left of the Kafra. He checks your level: from level 70 he lets you through at once. Then go back to the Recruiter for the Brave in the palace: he gives the first half of the experience and sends you to Lighthalzen.
Promotional Staff
Izlude (izlude), point 102/171.
/navi izlude 102/171
Step 5
Lighthalzen: the Guide tells you where to go next, the main building of the Rekenber corporation.
Guide
Lighthalzen (lighthalzen), point 220/292.
/navi lighthalzen 220/292
Step 6
In the Rekenber building keep to the right: right of the counter go up the red stairs and past the guards into the room. Sikaiz stands by the board: talk to him until he sends you to the Alliance Manager in Prontera.
Sikaiz
Rekenber headquarters (lhz_in01), point 132/259, upper floor.
/navi lighthalzen 106/248
Step 7
The Prontera palace again: in the corridor left of the entrance (where the Recruiter stands) the first door leads to the Alliance Manager's room. Talk to him and go back to Sikaiz.
Alliance Manager
Prontera palace (prt_cas), the room behind the door at 197/148; the NPC itself is at 19/98.
/navi prontera 156/358
Step 8
Sikaiz sends you to Rachel: the Alliance Manager stands in the middle of the square before the temple. Talk to him and go back to Sikaiz.
Alliance Manager
Rachel temple (ra_temple), point 119/113.
/navi ra_temple 119/113
Step 9
Sikaiz signs you up for the expedition and asks for your character's name: type it exactly, case included. Then report your departure to the officers.
Step 10
Go down to the ground floor and turn right at once: the passage leads to the banquet hall. Officer A and Officer B sit at the table: talk to them twice (first you overhear them, then you report).
Officer A
Rekenber headquarters (lhz_in01), banquet hall, point 32/22.
/navi lighthalzen 101/248
Step 11
Go back up and find the Guard standing alone between the two main entrances. Ask to be sent to the rift. (Walking round the room on the right you can overhear Munkenro near the guards: optional.)
Guard
Rekenber headquarters (lhz_in01), point 130/232.
/navi lighthalzen 106/248
Step 12
You arrive at the dimensional rift. The Rift Guard stands next to you: he takes you to the alliance camp.
Rift Guard
Dimensional rift (moc_fild20), point 349/179.
/navi moc_fild20 349/179
Step 13
The trial: find Munkenro in the east of the camp and confirm twice that you are ready. 80 Allied Soldiers appear: kill 40 of them within 15 minutes. Out of time? Talk to Munkenro again. Teleporting and saving are not allowed on this map: bring potions or a party.
Munkenro
Dimensional rift (moc_fild22b), point 230/197.
/navi moc_fild22b 230/197
Step 14
After the victory talk to Munkenro: he gives the second half of the experience, and the next talk sends you to the Midgard expedition camp. From then on you reach the New World through the Time-Space Gap Guard in the Morocc ruins.
1. From level 100 with a third (or eligible extended) job, talk to Instructor Ur at the entrance and choose advanced gear: he gives two orders, one for armor and one for a weapon.
2. Armor is made by Administrator Thorn in the armory: bring 15 Elastic Band (dropped by Wootan Shooter) and 3 Blue Hair (by Kobold) and choose the physical or magical set.
3. The weapon is made by Administrator Michael: 15 Old Pick (dropped by Pitman in the mine).
4. Every further armor piece or weapon costs 10 Eden Group Coin. The coins come from the missions of the 100~119, 120~140 and Advanced boards.
5. The gear is bound to the character. Free inventory space and weight before the exchange.
Episode 17.1 continues the 16.2 story and opens at level 130. The vendors stand in the sp_cor laboratory and become available after the episode's story quests.
Elyumina sells Illusion armor (level 130), a flexible branch with modules.
The Grace Operator sells the third tier of the class set, Grace (level 150). Parts cost Mysterious Component, the +9 refine ticket costs Cor Core. Offers for your branch are listed below.
Before spending resources compare a full Grace set with Illusion: different builds favour different ones.
An upgrade of Illusion armor. Yeoncheong trades an Illusion piece refined to +9 plus 900 Barmil Ticket for the matching Automatic piece.
This is an expensive step: refining Illusion to +9 the usual way is very hard. Automatic is optional; ticketed Grace +9 remains a working set until episode 18.
Yeoncheong — Automatic exchange
ba_in01, point 87/383. It is inside a building: the command leads to the entrance (ba_maison 140/96), then walk in to point 87/383.
/navi ba_maison 140/96
Level 170–190+Gray Wolf (episode 18)
Episode 18 opens at level 170; Gray Wolf equipment is worn from 190.
Emmet in the wolf village sells any piece for 350 Amethyst Fragment. Asad sells refine tickets: +7 for 1050 and +9 for 2250 Amethyst Fragment.
Three main pieces refined to +9 by tickets cost 7,800 Amethyst Fragment; it is a long-term goal, plan it in days.
Shadow gear uses six separate slots and is worn over regular equipment, so it can be collected alongside any set.
Sets are sold by Cat Hand Salesman Macaroon for [Kachua] Mileage Coupon: a cube with three pieces of a class set costs 15 coupons. The wiki page of each cube shows what is inside.
[Kachua] Mileage Coupon is given when a secret box is opened with a Kachua's Secret Key.
Right now keys do not drop from monsters and are not sold by NPCs.
Starting points for character development, rather than mandatory templates.
Equipment has been checked against active server drops, shops and reward scripts. Acquisition methods are listed below. Stat ranges are priorities, not all upper limits at once. Items and cards are alternatives for different slots and targets: check job, level, gender, refine and set requirements. Transcendent skills require the rebirth path.
Storm Gust / Lord of Vermilion
INT 90–99 / DEX 70–90 / VIT 20–40
Area magic
Storm Gust freezes and hits with Water, Lord of Vermilion with Wind, Meteor Storm with Fire. Pick the spell for the map's element. DEX shortens the cast.